How does the identiPol QA2 work and what does it measure
Introduction

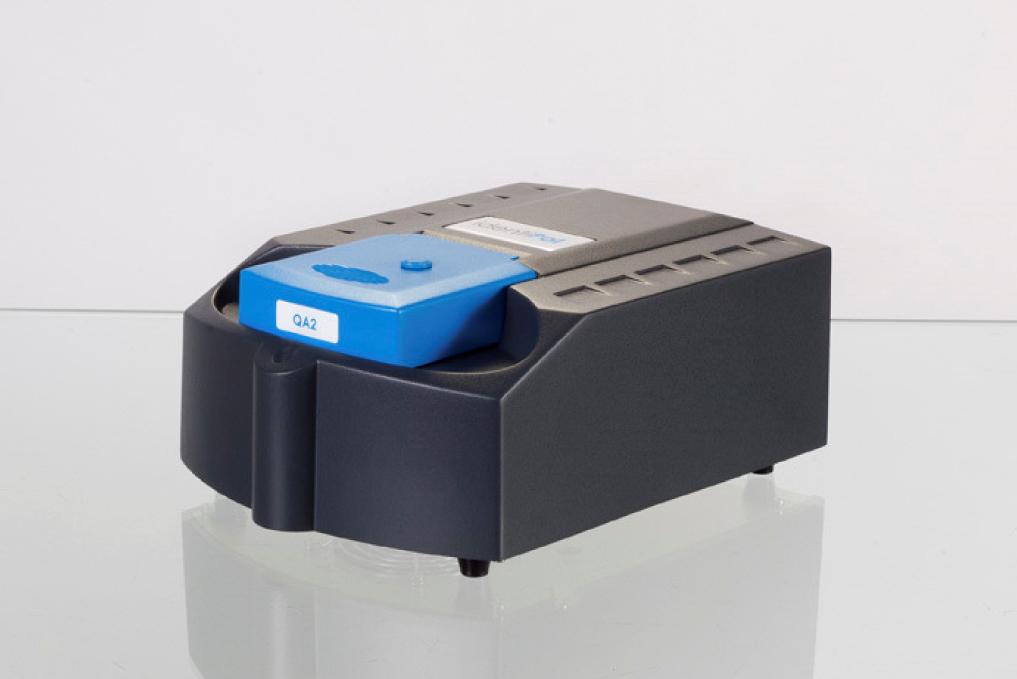
The identiPol QA2 is a machine that has been developed for the rapid measurement of thermoplastic materials in the manufacturing / quality assurance departments. It is based on fundamental scientific principles and has its origins in the field of thermal analysis. Thermal analysis is a collection of techniques that measure the property of a material as a function of temperature1 . One technique measures length as a function of temperature, another measures dielectric properties as a function of temperature, and so on. The typical output from a thermal analysis instrument is a graph with temperature along the x-axis and the property being measured as the y -axis. So, length would be plotted against temperature to give a graph that shows how a material might expand, soften or melt as it was heated.
Two of the most popular thermal analysis techniques used in the characterisation of thermoplastic polymers are Differential Scanning Calorimetry (DSC) and Dynamic Mechanical Analysis (DMA). A DSC measures heat flow based upon a temperature difference between a sample and inert reference and the resulting data can be used to measure melting, oxidation, cross-linking and glass transition (softening) temperature. A DMA measures the modulus (stiffness) of a material. The utility of these techniques to the characterisation and analysis of polymeric materials is well documented.
The identiPol QA2 combines aspects of both DSC (or more closely, Differential Thermal Analysis – DTA) and DMA into a single system. The combination of thermal techniques is quite common and often involves a compromise in performance when compared to the separate individual techniques. This may be a concern in the research laboratory where detection limits, resolution and precision are key factors – but are of less concern in the pragmatic manufacturing environment where the main focus is on productivity and quality. By combining DSC / DMA type measurements into a single unit a powerful system is created for the rapid analysis of thermoplastics. These measurements can then be used in three different modes of operation.
- Identification Mode = What type of plastic is this?
- Confirmation Mode = Is this batch acceptable for the production line?
- Comparison Mode = Is this material equivalent to our current supplier?
The Production Line vs. The Scientific Laboratory
For those who work mainly in the manufacturing and production area, the tools available for the analysis and characterisation of thermoplastics is somewhat limited. They range from the very simple such as burning and smelling, will it float or sink (a simple density measurement) to the slightly more sophisticated Heat Deflection Temperature (HDT) or Melt Flow Index (MFI) which measure mechanical or flow properties as a function of temperature. The trouble with these sorts of measurements is they often yield a single number or value that is used to asses manufacturing parameters and are not, in themselves, a measure of the materials full properties across the entire temperature range they will experience during manufacture. Consequently, two very different plastic materials could have the same MFI value but be entirely different plastics.
The problems raised by using MFI, HDT and other simple (but cost effective) tests are easily overcome by using the thermal analysis techniques of the product development or research laboratory. These sophisticated instruments can detect very subtle differences between material properties and, in the hands of an experienced scientist, be used for a thorough investigation into material failure or structure / property relationships. However it would not be unusual for a laboratory to spend around $100,000 - $150,000 on a DMA and DSC to make these measurements and then, of course, there is the salary of the scientist to operate them to consider. This cost and expertise is outside the budget afforded to most manufacturing sites.
The identiPol QA2 is positioned between these two extremes. It is a more sophisticated instrument than the HDT and MFI type of measurements and it does not have the research and development specifications and costs associated with a DSC / DMA combination. It is priced accordingly and has been designed to be used by nontechnical staff.
How does it work?

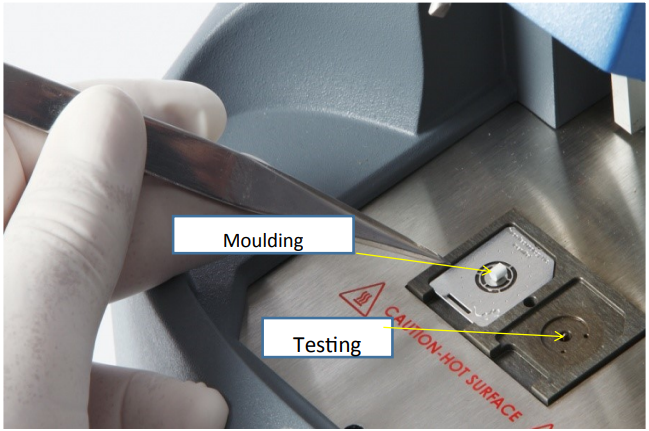
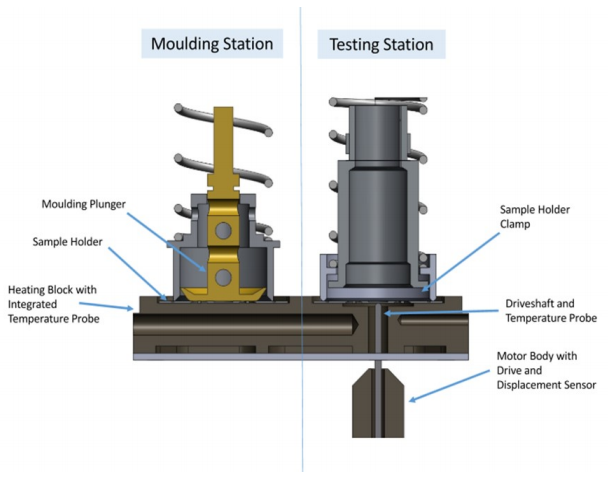
The identiPol QA2 uses a form of thermo-mechanical analysis (TMA) that has a strong relationship to both DMA and DTA, but is neither. It is simply a means of producing a reproducible thermo-mechanical fingerprint of the material being tested. In order to improve reproducibility and sample handling the plastic material (typically a granule or two) is placed onto a patented sample holder and placed into the moulding station within the machine.
The plastic is then automatically moulded within the machine to produce a highly reproducible test sample for measurement. Being in such close contact with the metal holder also allows high heating rates and ensures that the plastic sample heats rapidly. The operator then transfers the sample to the testing side where it is reheated to measure the thermo-mechanical fingerprint of the material. As the heating block is reheated at 30°/min, the sample area is vibrated by a force motor that contains a temperature sensor at its tip. These signals are used to calculate the stiffness, loss modulus and temperature difference for the sample during the test. These signals constitute the materials thermo-mechanical fingerprint.

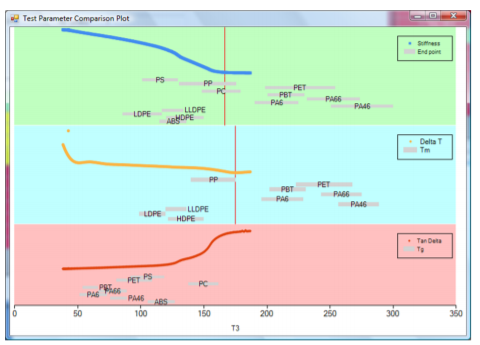
The ‘thermo-mechanical’ fingerprint (Figure 3.) that is finally measured consists of a number of parameters and three that will be very familiar to the thermal analyst are Stiffness, Tan Delta and Delta T. The test parameter results from the measurement of a piece of polypropylene are shown below.

What is measured?
From the measure signals, a number of transition temperatures are automatically recorded within the system software. These are:
- Glass Transition Temperature = the softening of any amorphous material
- Melting Point Temperature = the melting of any crystalline material
- End Point = the temperature at which mechanical integrity is lost
These transition temperatures, along with the raw signal data, are stored for each measurement made and are then interrogated by the system software to enable the three modes of operation outlined on Page 1.
Download Technical Note : TN2 – How does the identiPol QA2 work and what does it measure?
